
Abbreviations, used in manual:
RDA - Reference Data Admin
RDAD - RDA Designer
RDAE - RDA Editor
FW - Form Wizard
DD - Drop Down
This manual is a continuation of the FW manual, Step 2.
Here you can find details for the options 3-6 (numbers according to the attached print screen).
Note: when selecting a column (by clicking it's name) in the "Table Columns" area (1), the right-side menu will appear:
Please see detailed manual for the the "Table columns" (1) and "Advanced Form Settings" (2): Form Wizard, Step 2, "Table columns" & "Advanced Form Settings"
3. Display Settings
Label name - the column name that will be shown in the FW Step 4 / RDAE. By default, the "Label name" will be derived from the original database column name, formatted in camel case without underscores. It's possible to choose a different "Label name" value according to your requirements:
For example:
Step 2 settings:
Preview in Step 4 and in RDAE:
Field type - allows to choose the display type for the FW Step 4 / RDAE, according to the value chosen in the field "UI Element Category".
Please see detailed explanation with examples:
1). If in "UI Element Category" type Text is chosen:
In the "Field type" the following options will be available:
text - if this option is chosen, the field will be shown as a usual text field, as in the image below:
textarea - if this option is chosen, the field will be shown as extended text area, as in the image below:
email - if this option is selected, the user must enter the field in the format 'example@example'.
url - if this option is selected, the user must enter a valid URL. Otherwise, the field will be highlighted in red, and an appropriate warning message will appear:
password - if this option is selected, the entered value will appear as bullets, as shown in the image below:
2). If in "UI Element Category" type Number is chosen:
In the "Field type" the following options will be available:
number - the value is of type number.
range - when adding a new row or editing an existing row, the value will be shown as a range:
In "Advanced Settings" (5) it is possible to define minimum and maximum values for the range.
text - the value will be saved as a string in the DB.
3). If in "UI Element Category" type List is chosen:
In this case, instead of the option "Field type", there will be a "Select List" option with a list of all DD's available for current Project, for example:
Note: lists of type Multi-Select and Dynamic Multi-Select can be assigned only to the columns of type String/Text at the database level!
More information regarding DD's, can be found in the following detailed manual: RDA, Drop Downs
4). If in "UI Element Category" type Date is chosen:
In "Advanced Settings" (5), can be chosen required Date format, and values for the "Min Date" & "Max Date" fields:
5). If in "UI Element Category" type Boolean is chosen:
In the "Field type" the following options will be available:
checkbox - displays the Boolean values as a checkbox, valid for Strings with the values 'true' or 'false' and Boolean type.
switch - displays the Boolean values as a switch, valid for Strings with the values 'true' or 'false' and Boolean type.
checkbox (0-1) - displays the Boolean values as a checkbox, valid for Numeric types with the values 0/1 only.
switch (0-1) - displays the Boolean values as a switch, valid for Numeric types with the values 0/1 only.
Note: select the UI field type that matches the database field type to ensure consistency between the UI display and the database configurations!
6). If in "UI Element Category" type Other is chosen:
In the "Field type" the following option will be available:
color - field will display the selected color:
Place holder - set a place holder for the column. For example, if value "insert here" is used as "Place holder" value for the column "Branch", so in Step 4 / RDAE on Add & Edit, column "Branch" will look as follows:
Side help - the text entered into the "Side help" field in Step 2 will appear next to the column's field in RDAD Step 4/RDAE when adding or editing a row:
Help text - the text entered into the "Help text" field in Step 2 will appear under the column's input filed in RDAD Step 4/RDAE when adding or editing a row:
Help Color - allows to set the color, that will be shown in RDAD Step 4/RDAE, for the "Help text" & "Side help" values:
Title Hover - text displayed when hovering over the column name:
Summarizing example:
Values as text - the checkbox is available when selecting type "List" under "UI Element Category" for a column. Allows long numbers to be sent as Strings without rounding. Primarily relevant for decimal field types.
For example:
1. The original value in the database: 1.123456789
2. The value shown in Step 4 / RDAE when the "Values as text" checkbox is unchecked, will be rounded:
3. The value shown in Step 4 / RDAE when the "Values as text" checkbox is checked, won't be rounded:
4. Preview Field
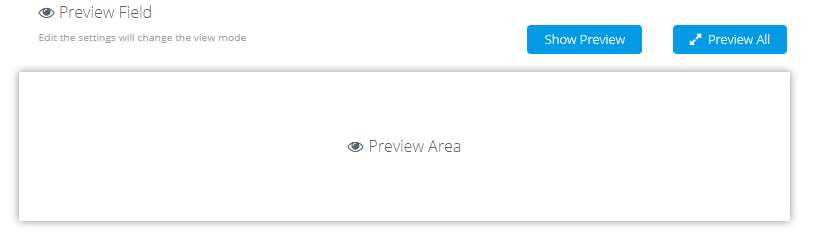
Allows seeing a preview display of the column according to the defined display settings
Show Preview button - displays the preview for the selected field:
"Preview All" button - displays the preview for every field in the FW:
5. Advanced Settings
- Required - check to make the field required to fill in on Add and Edit.
- Read Only (Add + Edit) - when marked, the field will not be available in the UI for adding a new row or editing an existing one. If the field has a value set in the "Default Value" field, that value will be automatically used when adding a new row. The same behavior applies when uploading data from an Excel file.
- Read Only on Edit - check to make the field read-only when editing an existing row. Please note that when adding a new row, the user will be able to insert a value.
- Element Size - select the size of the field.
- Min Value / Max Value - these fields allow to limit the range of values for specific column. For strings you can choose min/max length, for numbers- min/max values, for dates- min/max date range.
-
Default Value - allows to set a predefined value for a field, which will automatically populate when a new row is added.
- This option applies to all data types except for the Date type. For date fields, it is recommended to use the "Default Function (SQL)" option to set default values.
- If the "UI Element Category" is configured as a List (DD), the behavior depends on whether the default value exists in the dropdown:
- If the set default value is part of the DD List => it will appear pre-selected when adding a new row. The value will also be saved in the database and displayed in the FW.
For example:
If 'Levi' value is set as the Default Value in FW Step 2 and 'Levi' value exists in related DD => it will be automatically populated when adding a new row:
- If the set default value is not part of the DD List => it won't appear in the dropdown when adding a new row. However, if the user does not select a value, the default value will still be saved in the database and displayed in the FW.
For example:
If a default value that doesn't exist in the dropdown (e.g., 'c') is set as the Default Value in FW Step 2 => it won’t appear in the DD when adding a new row. However, if the user doesn’t select a value, 'Alpin' will still be saved automatically.
Default Value example in Step 2:
Add row example for "Column1" when 'c' value exists in related DD:
After saving 2 upper rows, the two added default values will be displayed differently: value 'Alpin' that doesn't exist in related DD, will be surrounded with parentheses. In contrast, value 'Levi', which is part of the DD, will be displayed without parentheses:
- If the set default value is part of the DD List => it will appear pre-selected when adding a new row. The value will also be saved in the database and displayed in the FW.
- Default Function (SQL) - a suitable (depending on DB type) SQL function or an SQL query can be used.
For example: when using MSSQL DB and column of type Date, in case you need the value 01/01/2000 to be set as a default, the following SQL query can be used: (SELECT CONVERT(DATE, '2000-01-01')):
6. Advanced Column Settings
This button is located at the bottom-right corner of the grid:
The following fields are shown on click:
Advanced Column Settings:
- Hide from form (Add & Edit) - hide the column when editing an existing row or adding a new row.
- Hide on add - hide the column when adding a new row.
- Hide on copy - hide the column when copying an existing row.
- Hide on edit - hide the column when editing an existing row.
- Hide on bulk edit - hide the column when using bulk edit.
Advanced Validations:
- Pattern - insert a regex pattern for validation that will be applied to the inserted/updated column's values.
-
Ignore NULL or Empty String validation - if checked, the regex ignores NULLs or empty strings.
This option is available only in the 'List' UI Element Category. - Wrong pattern message - the error message that will be displayed if value does not match the chosen regex.
Note: The "Advanced Validations" section isn't available for List column types. If a field is initially defined as non-DD with regex validation and then the field type is changed to DD, the regex validations will remain visible.
Dynamic Configuration:
- Required Group - select a group of columns to be part of a required group in which at least one of the fields has to be filled in.
-
Affected Columns - select columns that will receive the same value that the user inserts into the original column.
For example: if originally selected column "first name", and then selected the affected column to be: "last name" => "last name" will receive the same value as inserted into the field "first name". -
Show if - dynamically controls the visibility of a column based on a specific condition. This setting can be applied in different contexts, allowing to tailor the user interface based on the data or user actions.
- On Add - the field will be visible in the "Add New Row" form only when the condition is met.
-
On Edit - the field will appear in the "Edit Row" form only if the condition is satisfied.
For example:
A condition is set on the 'price' column as follows:
In "Edit Row" form the 'price' field is displayed only when the value in the 'Model' column is 4000:
In "Add New Row" form the 'price' field becomes visible only after the user enters 4000 into the 'Model' field:
The 'price' field is not visible because the condition is not met:
The 'price' field is displayed once the condition (Model = 4000) is satisfied.
Comments
0 comments
Please sign in to leave a comment.